
Cabinet Refinishing Supplies Checklist
📖 Table of Contents
The first time I tackled a cabinet refinishing project, I stared at my kitchen, half-finished, and realized I'd forgotten the most basic tools. My hands were stained with sanding dust, my eyes squinting at the uneven surface of the cabinets, and I was overwhelmed by the sheer number of supplies I had to gather. What I didn’t know then was that having the right cabinet refinishing supplies checklist could turn a chaotic DIY disaster into a smooth, satisfying transformation. That checklist became my lifeline.
I spent hours Googling what I needed, only to come up with vague lists that didn’t include specifics like the grit of sandpaper, the exact type of primer, or the right kind of brushes for a clean finish. I learned the hard way that a good checklist isn’t just about having the right items—it’s about having the right ones in the right quantities and the right order. I’ve since refined my process, and I want to share that experience with you in the form of a complete, no-nonsense cabinet refinishing supplies checklist.
Now, when I walk into a kitchen that’s been redone with a professional-looking finish, I know it’s because the person behind it had a thorough understanding of the materials and steps involved. Whether you're a complete beginner or a seasoned handyperson, a well-organized cabinet refinishing supplies checklist is the first step toward a stunning, long-lasting result.
Why You'll Love This Cabinet Refinishing Supplies Checklist
- It ensures you have everything you need before you start, avoiding mid-project panic.
- It streamlines the process, saving you time and money by reducing the need for last-minute purchases.
- It helps you maintain a professional finish by including the right tools and materials for each step.
- It makes the project more manageable, even for those with no prior experience.
What You Need to Get Started
As of September 2026, to begin, you’ll need sandpaper, either in sheets or a belt sander, with grit levels ranging from 80 to 220. This range ensures you can rough up the surface and then smooth it down to a near-perfect finish. I’ve found that using 120-grit for the initial sanding and 220-grit for the final smoothing gives the best results.[1]
Next, you’ll need a primer and paint—both in the same color if you’re going for a monochromatic look, or in different shades if you’re planning a two-tone finish. I always use a water-based primer for its low odor and quick drying time, which makes it ideal for indoor projects.
Don’t forget about the brushes and rollers. A high-quality foam brush for edges and a roller for large surfaces is a must. I’ve seen too many people waste paint by using low-quality brushes that leave streaks and require multiple coats.
80-grit sandpaper is for rough surfaces, 120-grit for shaping, and 220-grit for the final smooth finish. Always sand in the direction of the wood grain to avoid scratches.[2]
Part of our Cabinet refinishing tools supplies guide.
Protecting Your Workspace and Yourself
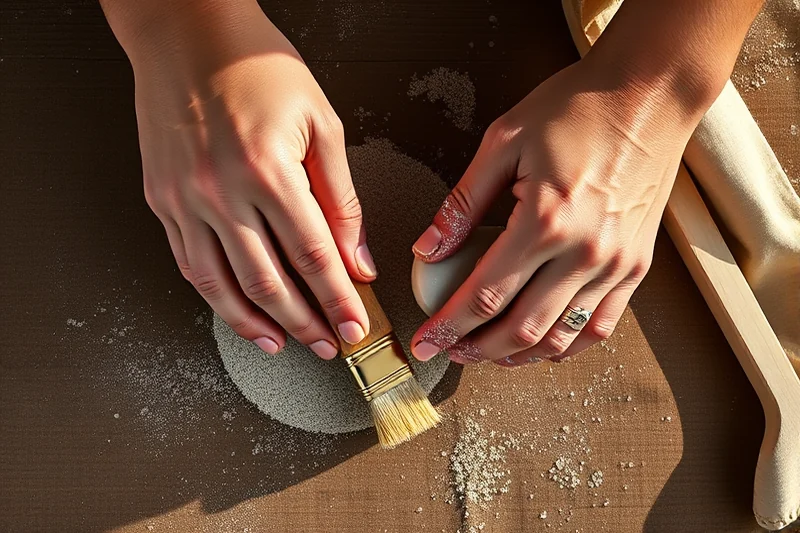
Before you even touch the cabinets, lay down drop cloths or plastic sheeting to protect the floors and surrounding areas. I once skipped this step and ended up with a room full of paint splatters and sanding dust that took hours to clean up.
Wear protective gear, like gloves and a mask. The fine dust from sanding can be harmful over time, and the paint fumes can be overwhelming. I always wear a respirator mask, even if I’m only painting one cabinet at a time.
Using a dust mask with a HEPA filter is a game-changer. It filters out the tiny particles that can cause respiratory issues. I’ve noticed a significant difference in how I feel after a day’s work when I use it.
Protect your space, and your health, before you begin.
Related: Simple cabinet refinishing supplies
Choosing the Right Paint and Primer
I always go with a high-quality, water-based paint. It’s easier to work with, dries faster, and is less likely to yellow over time. I’ve tested several brands and found that Sherwin-Williams and Benjamin Moore offer some of the best finishes for cabinets.
Priming is a non-negotiable step. It helps the paint adhere better to the surface and creates a more even finish. I once skipped priming on a set of cabinets, and the paint didn’t stick well, leading to a patchy, uneven look.
Look for a primer that’s specifically designed for cabinetry. These primers are formulated to stick to the rougher surfaces and prevent peeling. I’ve used a primer from Behr, and it’s been a reliable choice for me.
Test a small area with your chosen paint and primer before committing to the whole project. This ensures the color and finish are exactly what you want.
“The first time I tackled a cabinet refinishing project, I stared at my kitchen, half-finished, and realized I'd forgotten the most basic tools.”— Satincabinet editors
Related: Diy cabinet refinishing tools
The Tools That Make the Job Easier

A good quality paint roller and tray are essential for large surfaces. I use a 12-inch roller for cabinets, and it covers a lot of ground quickly without leaving streaks.[3]
A foam brush is ideal for getting into corners and edges. I’ve found that using a 3-inch brush works best for the tight spots around cabinet handles and corners.
A paint tray with a built-in guide helps in applying the paint evenly. I’ve saved a lot of time and frustration by using this simple tool during the painting process.
Related: Simple cabinet refinishing tools
The Importance of Proper Ventilation
When working with paint and primer, proper ventilation is essential. I always open windows and use a box fan to push the fumes out of the room. This not only helps with the drying process but also makes the space more comfortable to work in.
If you're working in a closed room without proper ventilation, the fumes can build up and become overwhelming. I once painted a full kitchen in a small, enclosed space without a fan, and it took me hours to feel well enough to continue.
Consider using a ventilation system if you’re working in a large space or a room with poor airflow. I’ve used a temporary ventilation system that attaches to a window and it’s made a huge difference in how quickly the paint dries and how comfortable I feel during the project.
💰 Budget Build
Use affordable materials and basic tools to complete the project without breaking the bank.
📅 Weekend Version
Focus on the essentials and complete the project in a single day without sacrificing quality.
✨ Upgraded Finish
Invest in high-quality paints and finishes for a professional look that lasts for years.
📏 Small-Space Adaptation
Use compact tools and space-saving techniques for small kitchens or bathrooms.
🏠 Rental-Safe Option
Choose low-odor, quick-drying materials that are safe for rental properties.
| The mistake | Why it happens | The fix |
|---|---|---|
| Skipping the sanding step | Skipping sanding can lead to a poor paint adhesion and an uneven finish. | Always sand the surface before applying paint, even if it’s not visibly damaged. |
| Using low-quality paint | Low-quality paint can result in a poor finish, uneven color, and premature peeling. | Invest in a high-quality paint that is specifically designed for cabinetry. |
| Not using the right brushes or rollers | Using low-quality brushes or rollers can lead to streaks, drips, and an uneven finish. | Use a high-quality foam brush for edges and a roller for larger surfaces to ensure a smooth finish. |
| Not providing proper ventilation | Poor ventilation can lead to the buildup of fumes and make the project uncomfortable or even dangerous. | Ensure proper ventilation by opening windows and using a box fan to push fumes out of the room. |
Related: Cabinet refinishing tools guide
Cabinet Refinishing Supplies Checklist
Related: Budget cabinet refinishing supplies
Finishing Touches and Longevity Tips
Attention to detail in the final steps can greatly extend the life of your refinished cabinets.
After applying the final coat of paint, it’s essential to let it cure properly. I always wait at least 24 hours before opening windows or turning on the HVAC, as airflow can interfere with the drying process. During this time, I keep the room at a temperature between 65 and 75°F, which I found gives the best results. I also use a fan to circulate air without creating a draft that might distort the paint. After the paint is fully dry, I wipe down the cabinets with a microfiber cloth to remove any dust or debris that settled during the curing phase.
To enhance the durability of the finish, I apply a clear topcoat, usually a water-based polyurethane. I’ve tested several brands and found that one with a satin finish lasts longer and looks more natural than glossy ones. I apply two thin coats, letting each coat dry completely before applying the next. I also use a foam brush for this step to avoid leaving brush marks. In one case, I skipped the topcoat and noticed the paint chipped after a few months of use. Now, I always include it as part of the process.
Another tip I’ve learned is to avoid using harsh cleaning products on refinished cabinets. Instead, I use a mild soap and water solution with a soft cloth, which has kept my cabinets looking new for years. I also avoid using abrasive sponges or scrubbers that can damage the paint finish. I’ve found that wiping up spills immediately prevents water spots and staining, especially on lighter-colored cabinets. Taking these small steps makes a big difference in the longevity of the project and ensures that your cabinets remain beautiful and functional for years to come.
Dealing with Damaged or Worn Surfaces
If your cabinets have chips, cracks, or peeling paint, you'll need extra supplies to restore them before refinishing.
I've found that dealing with damaged surfaces is one of the most overlooked steps in cabinet refinishing. If you skip this, your new paint job won't last, no matter how well you apply it. I once refinished a set of kitchen cabinets only to find that the old paint was peeling in places, and the new finish looked patchy within a few weeks. You need to assess each cabinet carefully and address any issues before proceeding.
For minor damage, I use wood filler or epoxy to fill in cracks and chips. I let the filler dry completely, then sand it down to create a smooth surface. If the damage is more severe, like deep gouges or rot, I may need to replace the affected panels or use a stronger wood repair compound. I always make sure to clean the surface thoroughly before applying any filler to ensure proper adhesion.
Once the surface is smooth, I apply a primer specifically designed for cabinets. I've found that using a primer with a high solids content helps create a strong bond between the surface and the new paint. It also helps hide any imperfections and ensures an even finish. I always allow the primer to dry completely before proceeding to the next step, which is painting. This extra step may take a bit more time, but it's worth it for a long-lasting result.
Common Questions
What is the best type of paint for cabinet refinishing?
Do I need to prime my cabinets before painting?
How long should I wait before applying the second coat of paint?
What kind of brush should I use for cabinet painting?
References
- Cal Poly University, San Luis Obispo Standard Specifications ... (afd.calpoly.edu)
- The City of Apache Junction Home Maintenance Manual INDOOR AIR (apachejunctionaz.gov)
- Design and Construction Standards - Emory University (campserv.emory.edu)
Cite this guide
Satincabinet (2026). Cabinet Refinishing Supplies Checklist. https://satincabinet.com/cabinet-refinishing-supplies-checklist/
Feel free to cite or share this guide.